
Free Children’s Scrubs Crochet Costume Pattern
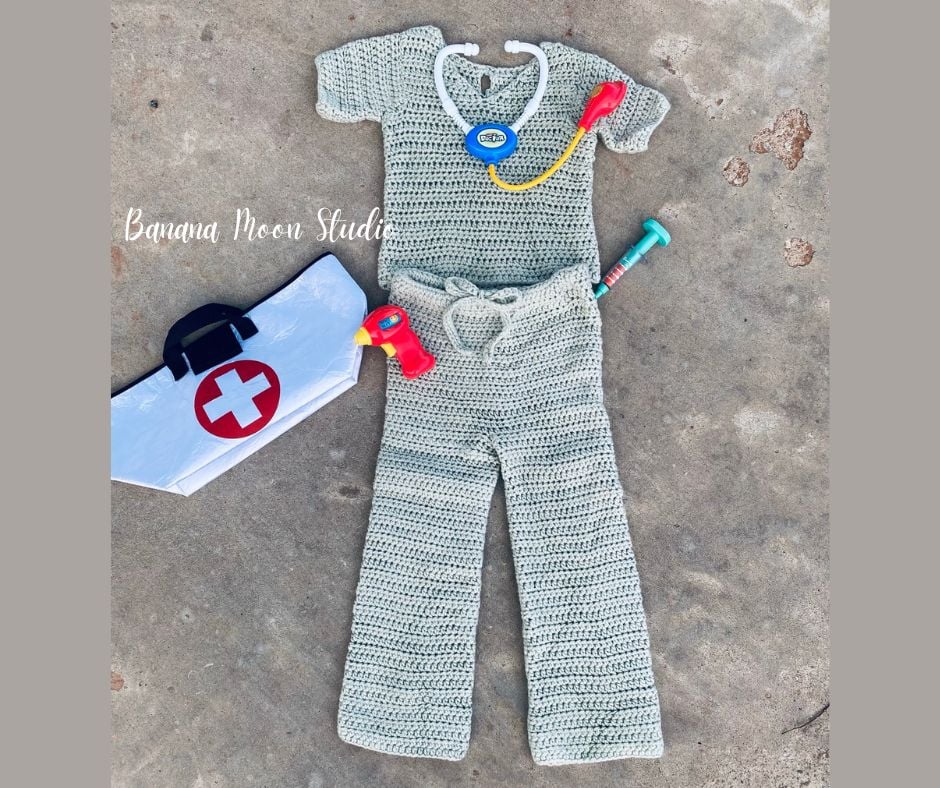
Crochet costume pattern
This children’s scrubs crochet costume pattern is a free crochet pattern for children sizes 2 through 10. Crochet this costume for your kiddos and they can dress up as one of today’s greatest heroes, a nurse or doctor! The costume is made in Lion Brand Vanna’s Choice yarn, which is easy to find, and machine washable.
This post contains affiliate links. If you click on one and make a purchase, I will earn a small commission at no additional cost to you. See my disclosure policy for details.
I want to take this opportunity to say a great big THANK YOU to nurses, doctors, and scientists that have been my personal heroes throughout the Covid-19 pandemic. I designed this particular pattern in tribute to the great sacrifices made by these professionals to take care of the rest of us during this time!
Table of Contents
What yarn should I use?
To make this crochet costume pattern you will need Lion Brand Vanna’s Choice yarn. I used the color #178 Sea Glass. Many thanks to Lion Brand Yarn, who provided the yarn for this project! To make just the top you will need 2-3 skeins. For the pants only you will need 3-6 skeins. If you are making both the top and pants you will need 4-8 skeins, depending on which size you are making.
Ad-free PDF available
You can get this pattern free, ad-supported below. Just scroll down for the free version!
If you decide to use the free version, please bookmark this page and come back to it when you work on your project rather than trying to print or screenshot the page. Your time on this page helps me get paid for my work, so thank you!
If you would prefer an ad-free PDF of this crochet costume pattern, you can get one at Ravelry or Etsy. The PDF also includes a schematic with measurements of the various pieces.
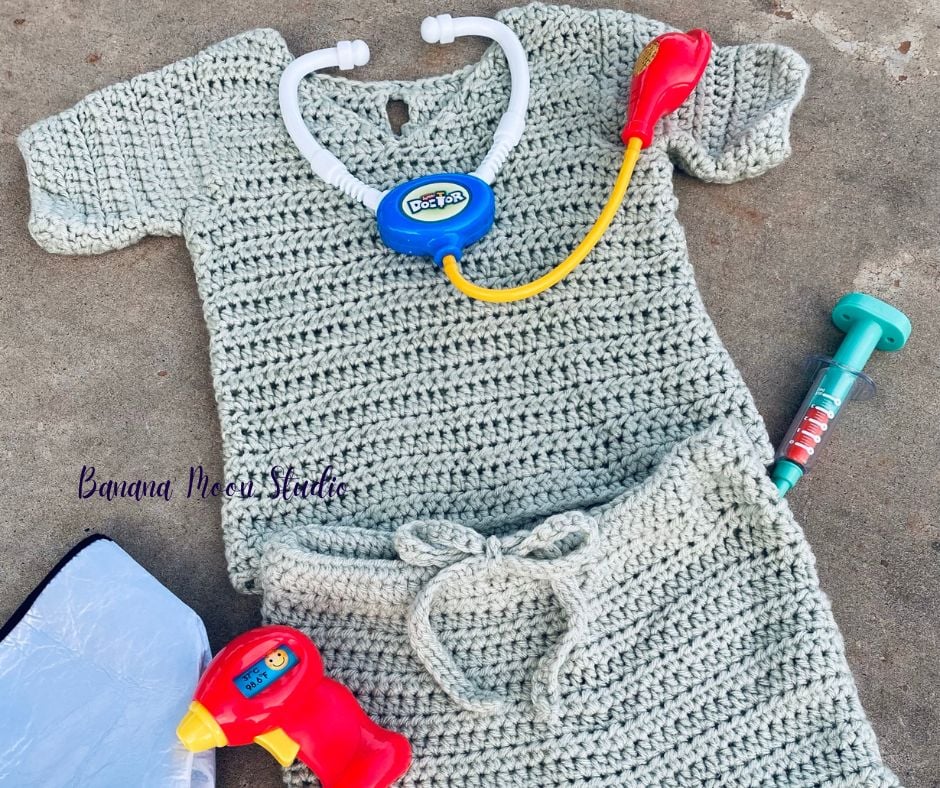
Children’s Scrubs Costume, a Free Crochet Costume Pattern
By April Garwood of Banana Moon Studio
(C)2021 April Garwood. As with all my patterns, please do not make paper or digital copies for others. Instead, please direct them to my website to get their own. Thank you!
Difficulty Level: Easy
Available Sizes: Children’s 2 [4, 6, 8, 10]
Finished Measurements:
Top chest circumference 23 [24 ½, 27 ½, 28 ¾, 30 ¼] inches, length 10 ¼ [11 ¼, 13, 15, 16 ¾] inches.
Bottom hip circumference 24 ½ [25 ¾, 27 ¼, 30 ¼, 31 ¾] inches, inseam 12 ¾ [16, 18, 23 ¼, 24 ¼] inches.
Yarn: Lion Brand Vanna’s Choice (100% Acrylic; 170 yd; 100 g; yarn weight category 4/Medium/Worsted): #178 Sea Glass.
- Top only 2 [2, 2, 3, 3] skeins
- Bottom only 3 [3, 4, 5, 6] skeins
- Set 4 [5, 5, 7, 8] skeins
Crochet Hook: K (6.5 mm), or size needed to match gauge
I use and recommend Furl’s Streamline Metal crochet hooks!
Notions:
7/8” diameter button
sewing thread to match yarn
Gauge: 11 sts x 8 rows = 4 inches in half double crochet
Notes
Instructions for size 2 are given, with changes for the additional sizes in [ ].
You will work in the round, but you will join at the end of each round and turn. Turning is essential to create a straight seam in half double crochet.
You will construct the top and sleeves separately and seam the sleeves in to the top. I have a tutorial for seaming here.
For the pants, you will make one leg, fasten off, make the other leg, and continue from there, connecting both legs as you work from the crotch, up. At the top of the pants, you will fasten off. Then you will make the drawstring, and then sew it into a casing made by folding over the top two rounds.
This video shows you how to connect the legs as you begin to crochet around the hips.
This video shows you how to put in the drawstring.
This pattern uses standard US terms. For help with abbreviations, get my free, printable crochet abbreviations list here.
See this tutorial post for help with basic crochet stitches.
Special Stitches
Half double crochet two stitches together (hdc2tog): Yo, insert hook in first designated st, yo, pull up a loop, yo, insert hook in second designated st, yo, pull up a loop, yo, pull through all 5 loops on hook.
Scrub Top
Ch 62 [66, 74, 78, 82], making sure not to twist ch, sl st in first ch to join into a ring.
Rnd 1 (RS): Ch 2 (does not count as a st), hdc in each ch around, join to first st with sl st, turn – 62 [66, 74, 78, 82] sts.
Rnd 2: Ch 2, hdc in each st around, join to first st with sl st, turn.
Repeat Rnd 2 for a total of 12 [14, 18, 20, 22] rows.
Front (split at armhole for front and back)
Row 1 (RS): Ch 1, sl st in first 3 [3, 5, 5, 5] sts, (sl st, ch 2, hdc) in next st, hdc in next 24 [26, 26, 28, 30] sts, leave remaining sts unworked, turn – 25 [27, 27, 29, 31] sts.
Row 2: Ch 2, hdc in each st across, turn. Place marker in center st of this row.
Begin neckline shaping, Front Left Shoulder
Row 1 (RS): Ch 2, hdc in first 11 [12, 12, 13, 14] sts, hdc2tog over next 2 sts including marked st, leave marker in place, leave remaining sts unworked, turn – 12 [13, 13, 14, 15] sts.
Row 2: Ch 2, hdc2tog over first 2 sts, hdc in each remaining st, turn – 11 [12, 12, 13, 14] sts.
Row 3: Ch 2, hdc in each st to last 2 sts, hdc2tog over last 2 sts, turn – 10 [11, 11, 12, 13] sts.
Row 4: Repeat Row 2 – 9 [10, 10, 11, 12] sts.
Row 5: Ch 2, hdc in each st across, turn.
Alternate repeating Rows 2 and 5 for a total of 7 [7, 7, 9, 11] rows since beginning the neckline shaping.
Last row: Ch 2, hdc2tog over first 2 sts, hdc in next 2 sts, sc in next 2 [3, 3, 3, 3] sts, sl st in last 2 sts – 7 [8, 8, 8, 8] sts. Fasten off.
Front Right Shoulder
Row 1: Join yarn with sl st to marked st, remove marker, ch 1 (does not count as a st), no further sts in the marked st, hdc in each remaining st across, turn – 12 [13, 13, 14, 15] sts.
Row 2: Ch 2, hdc in each st to last 2 sts, hdc2tog over last 2 sts, turn – 11 [12, 12, 13, 14] sts.
Row 3: Ch 2, hdc2tog over first 2 sts, hdc in each remaining st, turn – 10 [11, 11, 12, 13] sts.
Row 4: Repeat Row 2 – 9 [10, 10, 11, 12] sts.
Row 5: Ch 2, hdc in each st across, turn.
Alternate repeating Rows 2 and 5 for a total of 7 [7, 7, 9, 11] rows.
Last row: Sl st in first 2 sts, sc in next 2 [3, 3, 3, 3] sts, hdc in next 2 sts, hdc2tog over last 2 sts – 7 [8, 8, 8, 8] sts. Fasten off.
Back
Row 1: With RS facing, count from the end of Front, Row 1, leave 6 [6, 10, 10, 10] sts unworked at underarm, (sl st, ch 2, hdc) in next st, hdc in next 24 [26, 26, 28, 30] sts, turn, leaving remaining sts unworked – 25 [27, 27, 29, 31] sts.
Row 2: Ch 2, hdc in each st across, turn.
Repeat Row 2 for a total of 4 [4, 4, 6, 8] rows since beginning the back. Place marker in center st.
Note: At this point you should have a total of 6 [6, 10, 10, 10] skipped sts at each underarm.
Back Right Shoulder
Row 1: Ch 2, hdc in each st, ending in marked st, leave marker in place, turn – 13 [14, 14, 15, 16] sts.
Rows 2-4: Ch 2, hdc in each st across, turn.
Row 5: Ch 2, hdc in first 6 [7, 7, 7, 7] sts, hdc2tog over next 2 sts, turn – 7 [8, 8, 8, 8] sts.
Row 6: Ch 2, hdc in first 3 sts, sc in next 2 [3, 3, 3, 3] sts, sl st in last 2 sts. Fasten off.
Back Left Shoulder
Row 1: (Sl st, ch 2, hdc) in marked st, hdc in each remaining st, turn – 13 [14, 14, 15, 16] sts.
Rows 2-4: Ch 2, hdc in each st across, turn.
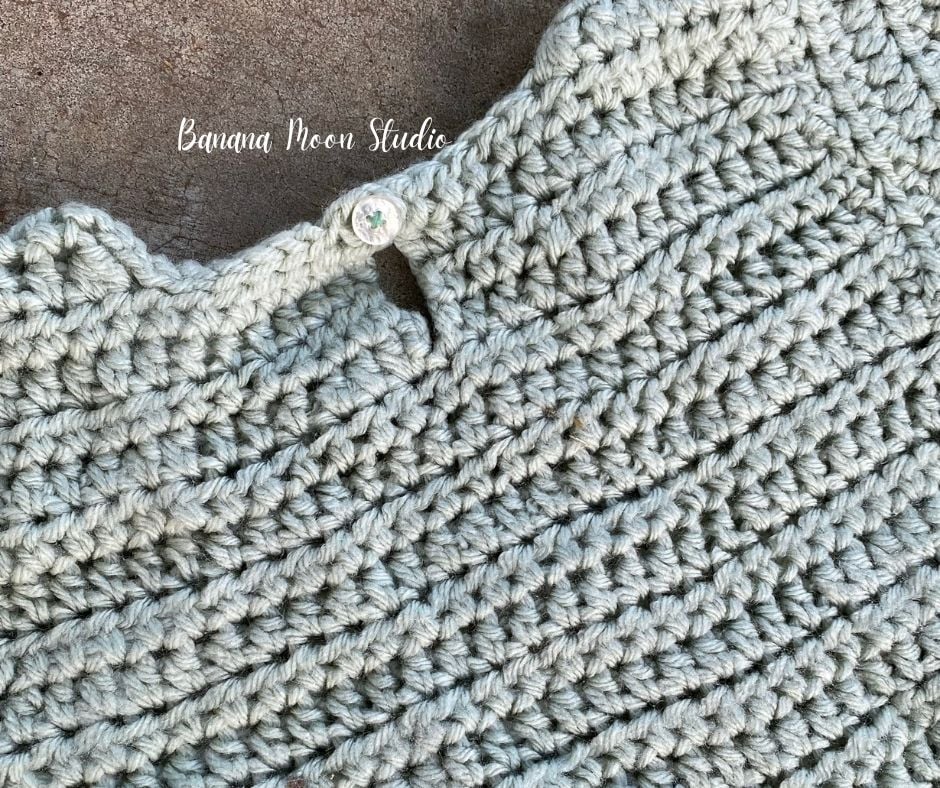
Row 5: Ch 3 for button loop, sl st in first 6 [6, 6, 7, 8] sts, ch 1, hdc in last 7 [8, 8, 8, 8] sts, turn – 7 [8, 8, 8, 8] hdc.
Row 6: Sl st in first 2 sts, sc in next 2 [3, 3, 3, 3] sts, hdc in last 3 sts. Fasten off.
Sleeve (make 2)
Ch 26 [26, 26, 30, 36], being careful not to twist ch, sl st in first ch to close circle.
Rnd 1: Ch 2, hdc in each ch, join to first st with sl st, turn – 26 [26, 26, 30, 36] sts.
Rnd 2: Ch 2, hdc in each st, join to first st with sl st, turn.
Repeat Rnd 2 for a total of 6 [6, 8, 10, 12] rnds.
Split into rows for sleeve cap
Row 1: Ch 2, hdc in each st, do not join, turn.
Repeat Row 1 until you have completed 3 [3, 4, 4, 4] rows after the split for the sleeve cap. Fasten off.
Finishing
With top WS out, bring shoulders together and backstitch across shoulders to seam.
With top WS out and sleeve RS out, place sleeve inside of top lining up raw edges of sleeve and armhole. Line up top center of sleeve cap with shoulder seam. Whipstitch around armhole to attach sleeve. Always place tapestry needle under at least two strands of yarn to avoid creating big holes.
Need help with this? See my video tutorial here.
Use sewing thread and sewing needle to attach button to top of back neckline opening, opposite the button loop.
Pants
Leg (make 2)
Ch 36 [40, 42, 46, 50]. Making sure not to twist ch, join to first ch with sl st to form circle.
Rnd 1(RS): Ch 2 (does not count as a st), hdc in each ch around, join to first st with sl st, turn – 36 [40, 42, 46, 50] sts.
Rnd 2: Ch 2, hdc in each st around, join to first st with sl st, turn.
Repeat Rnd 2 for a total of 24 [30, 34, 44, 46] rnds. For first leg made, fasten off. For second leg made, do not fasten off.
Join legs
See my free video tutorial for this part here.
With legs RS out and folded in half with seams in the middle of one side, hold legs together with seams together in the middle, second leg that you made closest to you, and first leg you made behind it. Mark the 4 [6, 6, 6, 8] st to the left of the join in the last rnd of each leg. Set first leg made aside for now.
Rnd 1: Ch 2, hdc in each st to marked st, hdc in marked st, pick up other leg, hdc in marked st, hdc around to join of this leg, join to first st on other leg with sl st, turn – 66 [70, 74, 82, 86] sts.
Rnd 2: Ch 2, hdc in each st around, join to first st with sl st, turn.
Repeat Rnd 2 for a total of 16 [18, 20, 22, 26] rnds since joining the legs. Fasten off.
Drawstring
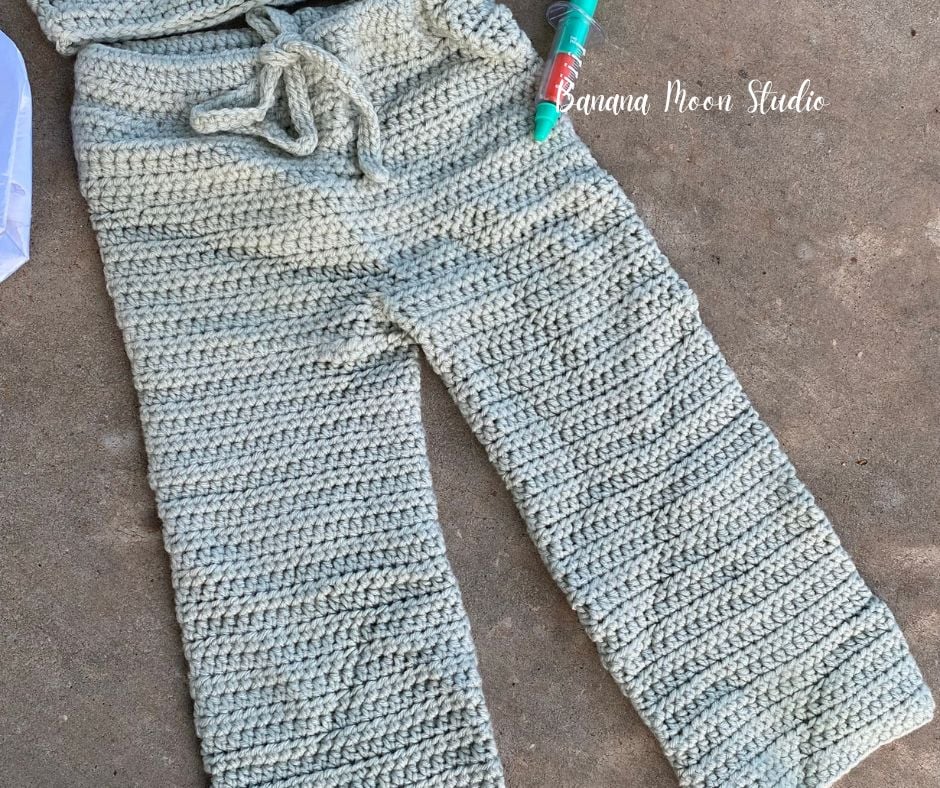
Make a crochet chain that is about 10 inches longer than the circumference of the waist of the pants, skip first ch, sc across. Fasten off. Weave in the ends of the drawstring.
Use crochet hook to pull two ends of drawstring through two spaces between sts close to the middle front of the waist line in the 3rd row from the top. Pull a few inches through on both sides and arrange the rest so that it will sit inside the casing. Fold over top 2 rows of pants to form a casing around the drawstring. Using yarn and yarn needle, sew the edge of this down. See this video for help putting in the drawstring.
Finishing
From the inside of the pants, sl st or sew the crotch closed with yarn and yarn needle.
Weave in ends. Block. Enjoy!
I would love to see photos of your in-process or finished projects! You can share them on Instagram and tag me, or you can join my friendly Facebook group and share them there.
Happy crocheting!

Save this for later with Pinterest!


These are so simple but adorable!! I love them!