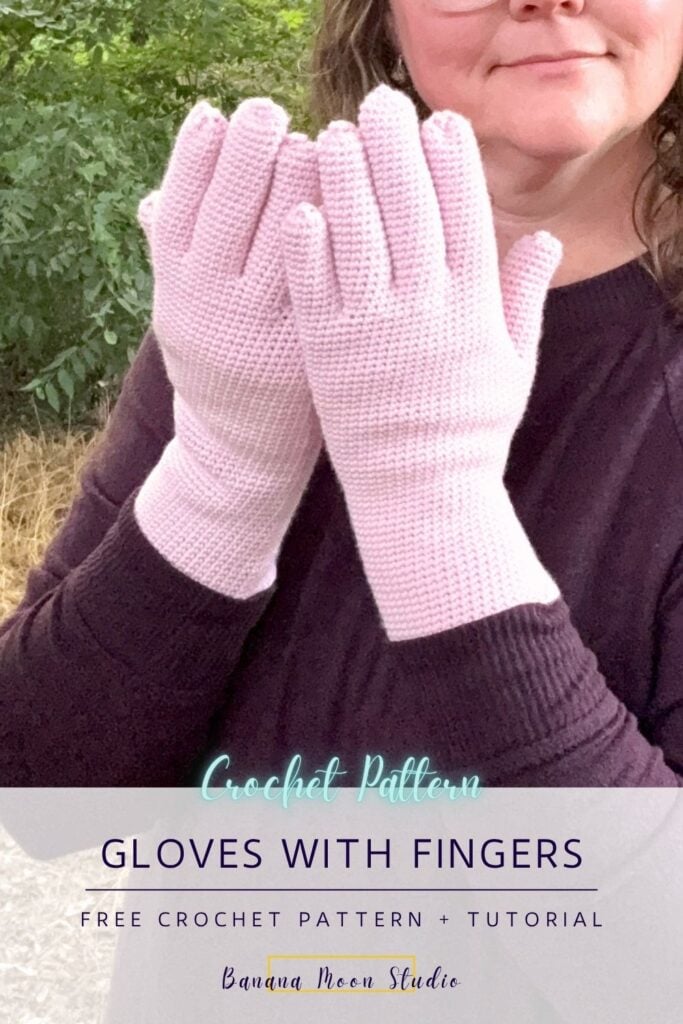
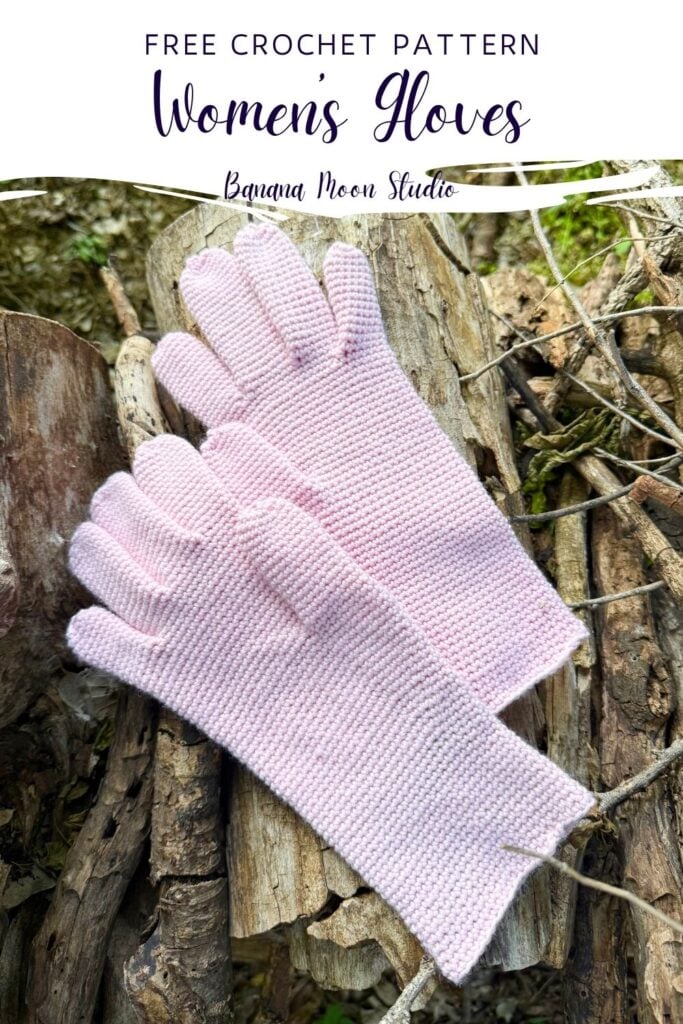
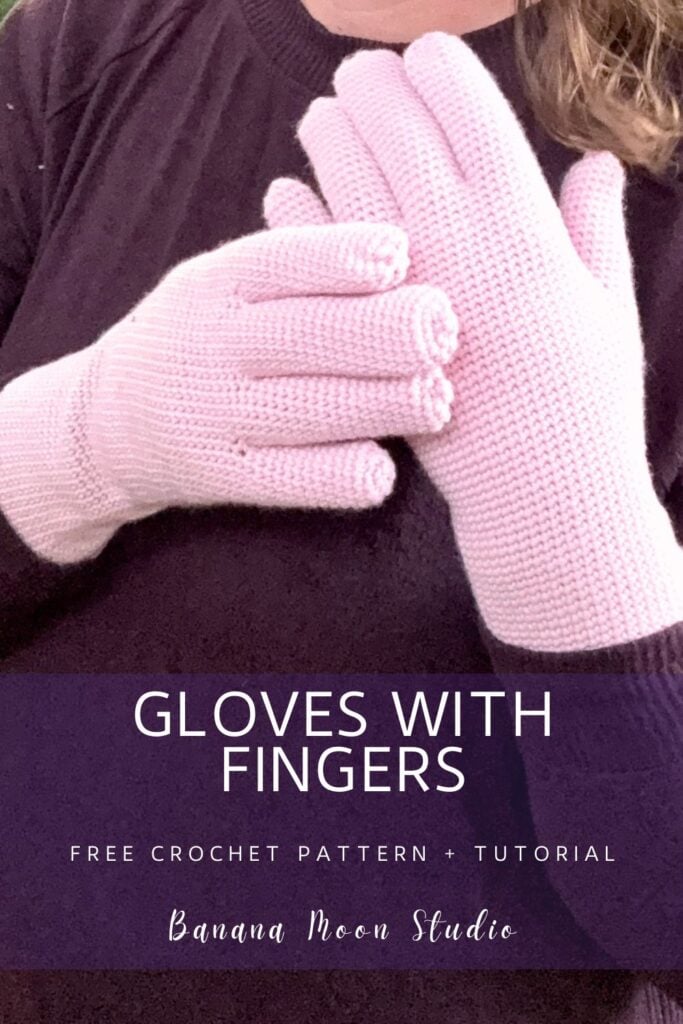
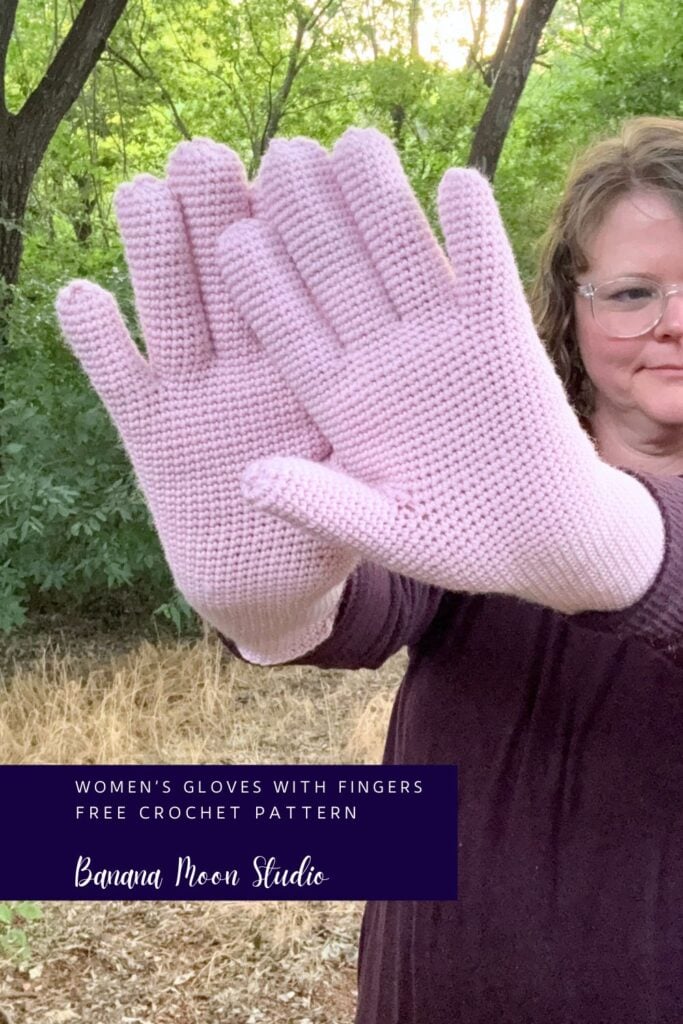
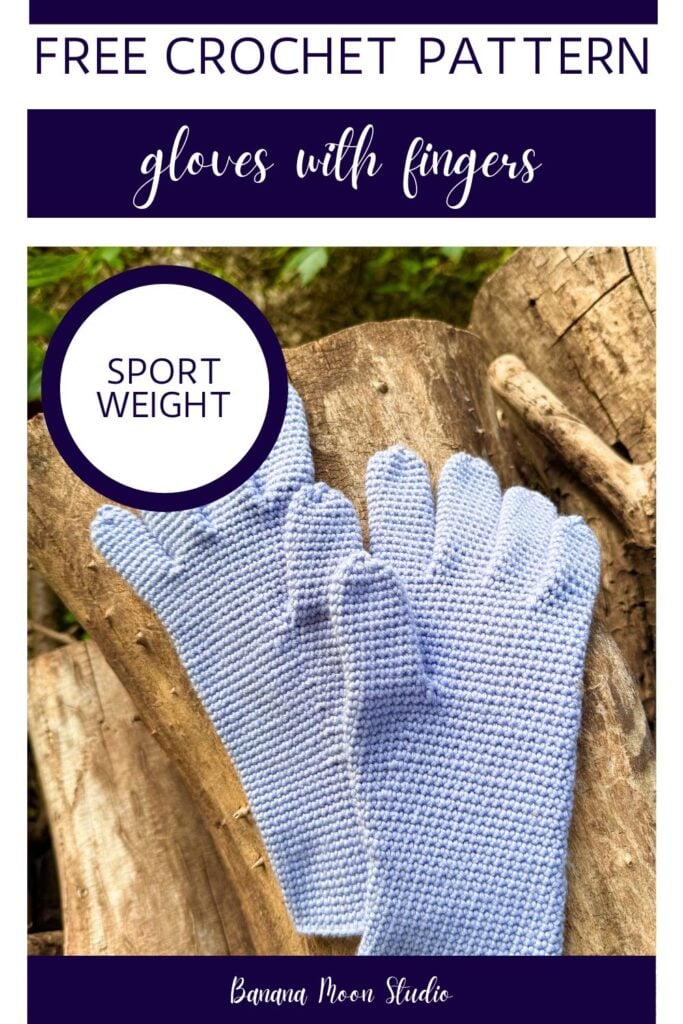
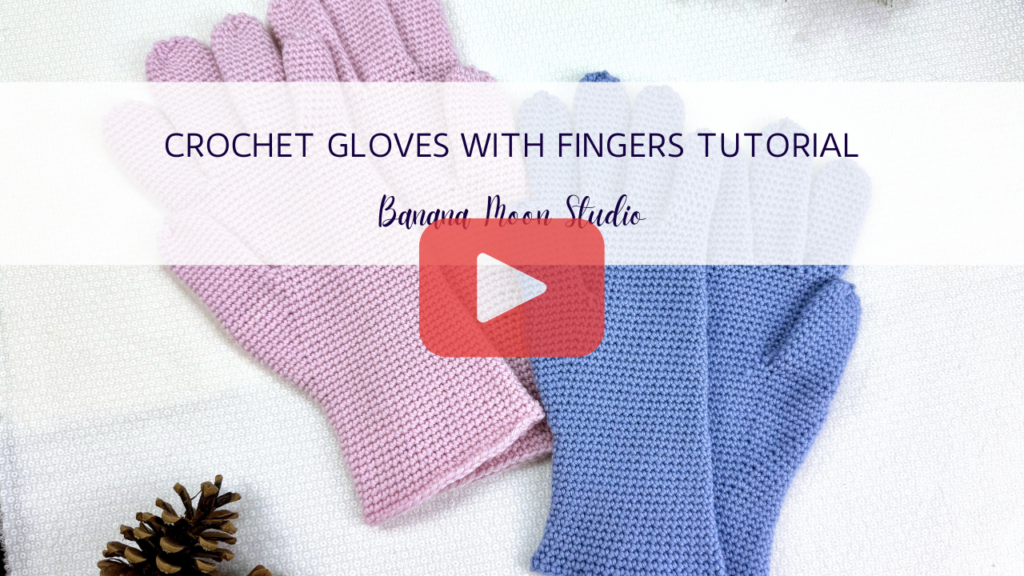
Crochet Gloves With Fingers Free Pattern
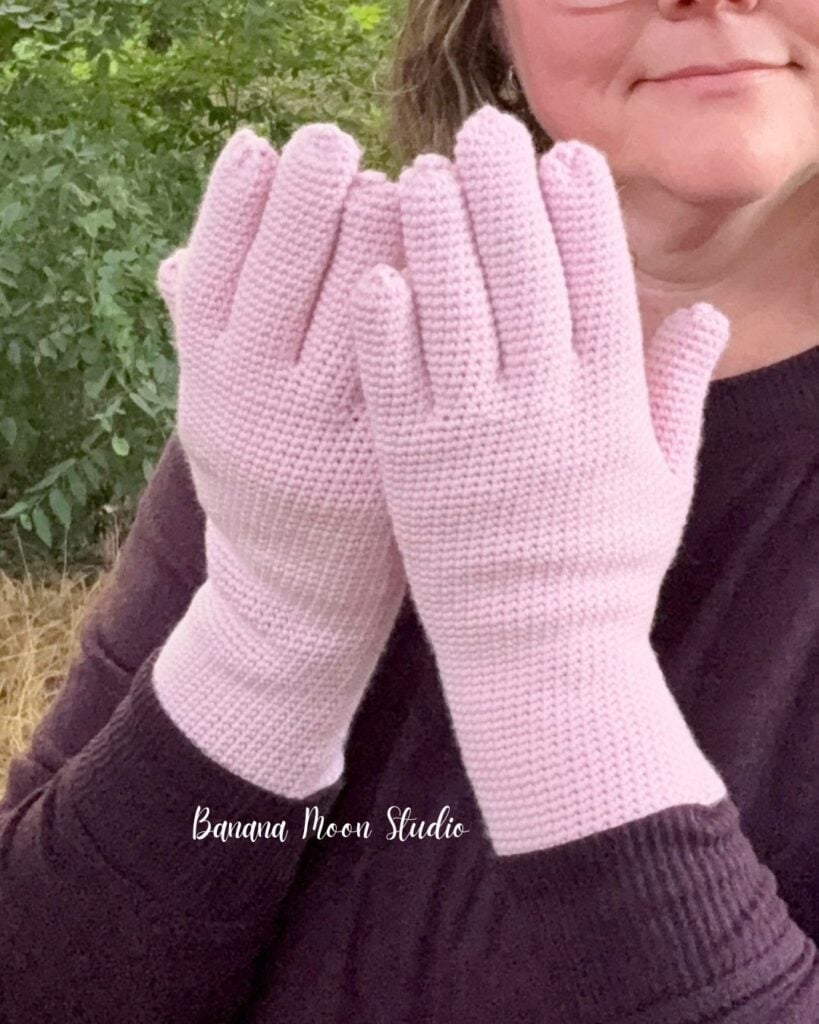
This pattern for crochet gloves with fingers includes three sizes for adults with palm circumferences of 7, 8, and 9 inches. The crochet gloves use sport weight yarn.
This post may contain affiliate links. If you click one and make a purchase, I will earn a small commission at no additional cost to you. See my disclosure for details.
Table of Contents
Are crochet gloves easy to make?
Yes and no. Crochet gloves aren’t a beginner project because the construction may be difficult to understand. But once you understand how they are constructed, you’ll find that they are an easy project with long stretches of mindless single crochet.
Why would I want to crochet gloves?
I have found both crochet and knit gloves to be great projects!
First, they are small and portable. Great for stitching on the go and a good summer project because they aren’t going to heat up your lap like a blanket, sweater, or scarf.
Second, they are always useful. If you have enough yarn in the right thickness and you aren’t sure what to make with it, someone you know can use a pair of gloves. They will always be put to use.
Third, there are long stretches of mindless single crochet when making gloves with fingers. You’ll need to pay a little attention through the thumb gusset increases and of course, when you start each finger. But most of the work is very easy.
Where can I get this full fingered glove pattern?
This crochet glove pattern is free right here in this post! Just scroll down for the free version.
You will need to sign up for my free newsletter with an email address in order to access the full, free pattern. If you decide to use the free version, please bookmark this page and come back to it when you work on your project rather than trying to print or screenshot the page. Your time on this page helps me get paid for my work, so thank you!
Coming soon, you will also have the option to purchase an ad-free PDF if you prefer. It will be available in both of my shops when it is finished.
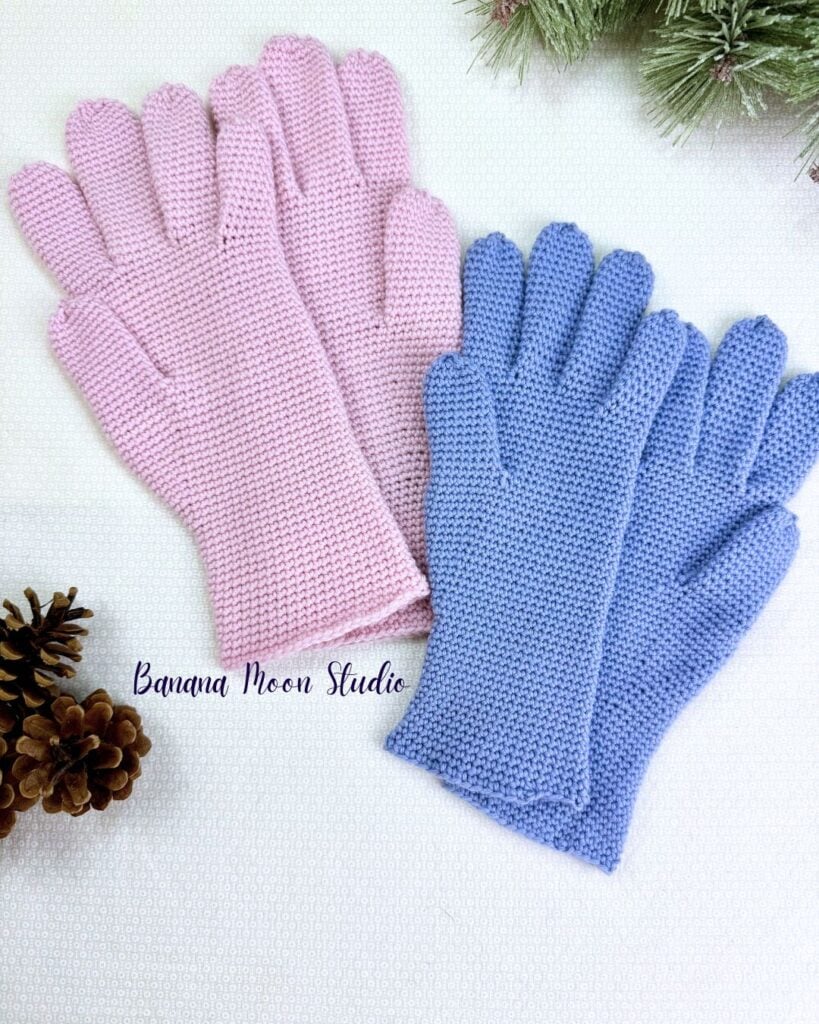
Crochet Gloves With Fingers
By April Garwood of Banana Moon Studio
(C)2026 April Garwood. As with all my patterns, please do not make paper or digital copies for others. Instead, please direct them to my website to get their own. Thank you!
Difficulty Level: Intermediate
Available Sizes: Adult S [Adult M, Adult L].
Finished Measurements: Palm circumference 7 [8, 9] inches
Yarn: Cascade Yarns Heritage 6 (75% Superwash Merino Wool, 25% Nylon; 292 yds; 100 g; yarn weight category: 2/Fine/Sport): 5648 Strawberry Cream, 5660 Gran, or 5739 Sweet Lavender
Yardage: 248 [318, 367] yds
Crochet Hook: E (3.5 mm), or size needed to match gauge
I use and recommend Furl’s Streamline Metal crochet hooks!
Notions:
Gauge: 25 sts x 30 rnds = 4 inches in single crochet in rounds
Notes
This pattern uses standard US terms. For help with abbreviations, get my free, printable crochet abbreviations list here.
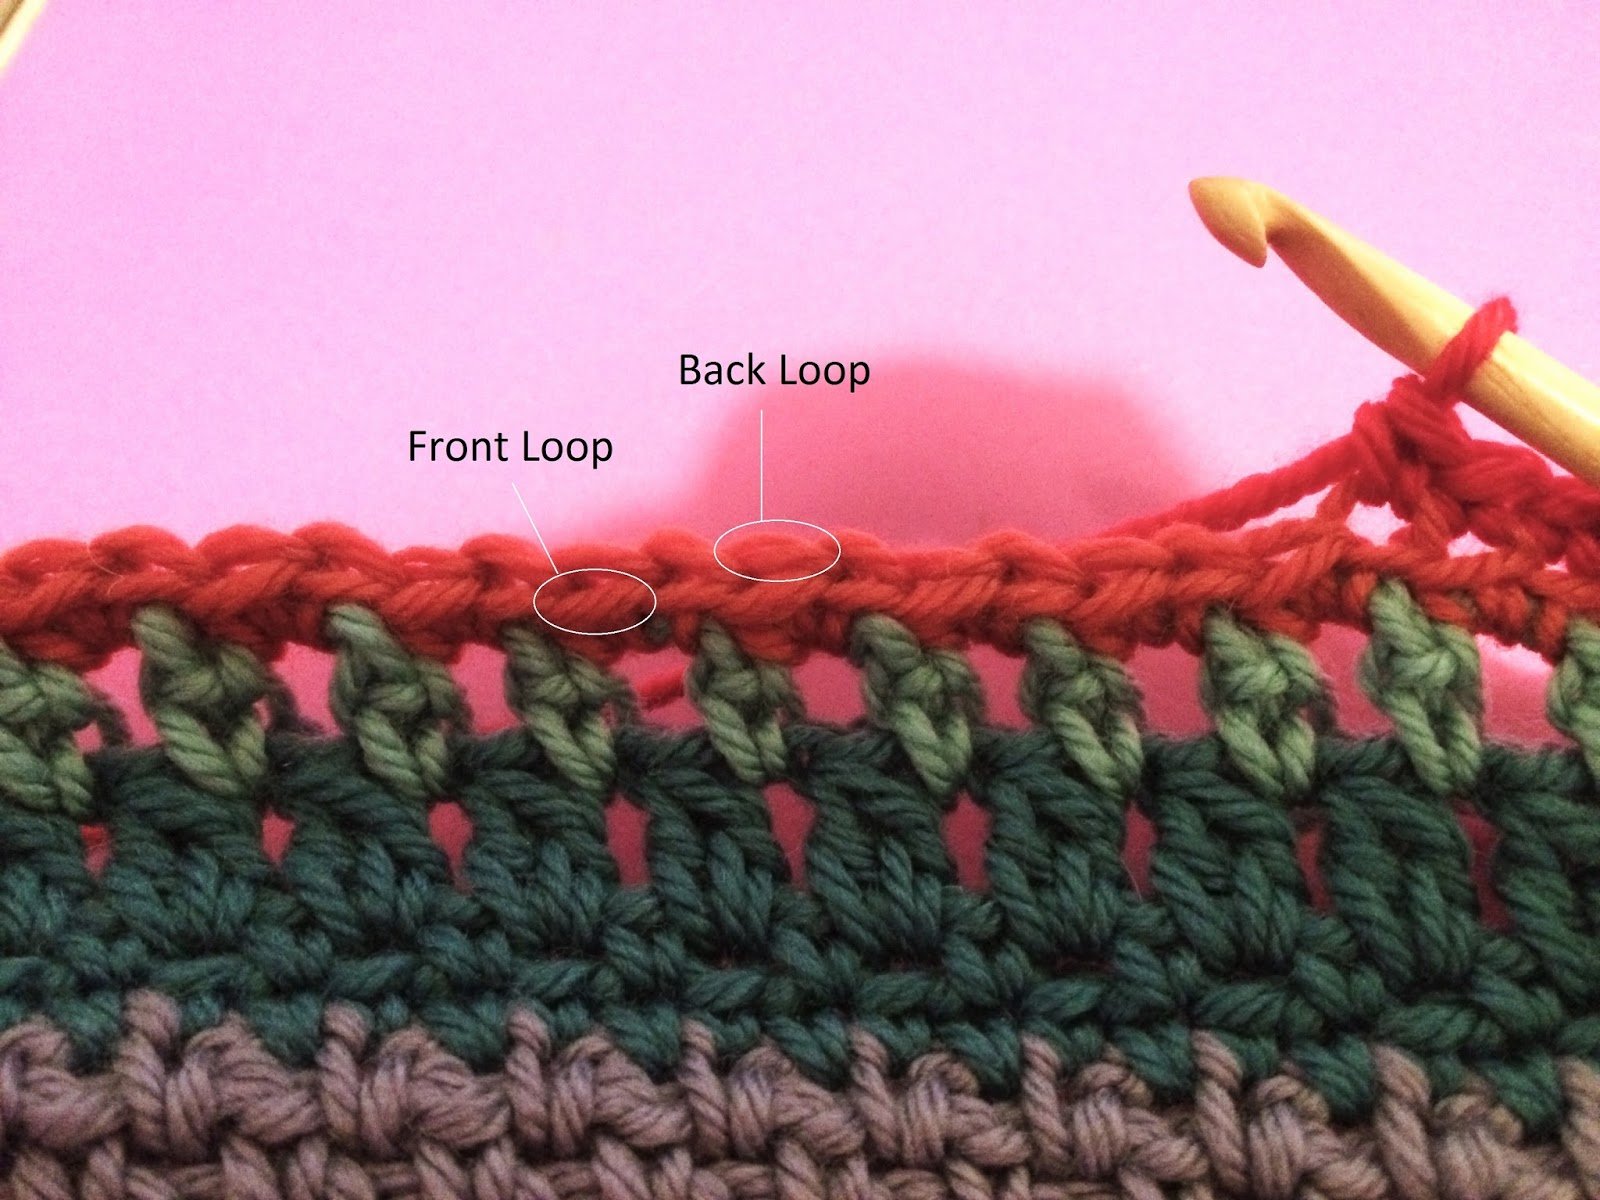
See this tutorial post for help with basic crochet stitches.
Choose the size that is closest to having the same palm circumference as your actual hand. This dense fabric minimizes holes, but isn’t very stretchy so working close to body measurement is perfect.
There is a lot of variation in hand sizes. Choose the size you will make based on palm circumference. If you are able, try on the glove as you are making it and adjust length as needed to fit correctly. You may need to add or take away rounds in the palm or the fingers to make it “fit like a glove.” If you aren’t making it for someone that lives nearby, make it according to the pattern for a more generalized fit.
Slip stitches will not be included in the stitch counts in the final round of each finger.
Special Stitches
Increase (inc): 2 sc in designated st.
Single crochet two stitches together (sc2tog): Insert hook in first designated st, yo, pull up a loop, insert hook in second designated st, yo, pull up a loop, yo, pull through all 3 loops on hook.
Video Tutorial
Click the image or caption to view the tutorial video on YouTube.
Right Glove
Cuff
Ch 38 [44, 48], join with sl st in first ch.
Rnd 1: Ch 1, sc in bottom ridge loop of each ch around, do not join or turn – 38 [44, 48] sc.
Rnd 2: Sc in first st, place BOR marker and move up as work progresses, sc in each st around.
Rnd 3: Sc in each st around.
Repeat Rnd 3 until you have worked a total of 16 rnds.
Thumb Gusset
Rnds 1-2 (even rnds): Sc in each st around.
Rnd 3: Sc in first 2 sts, 2 sc in next st, place marker in 2nd st of inc, 2 sc in next st, place marker in 1st st of inc, sc in each remaining st – 40 [46, 50] sc.
Rnds 4-5: Sc in each st around.
Rnd 6: Sc to first marker, 2 sc in marked st, place marker in 1st st of inc, 2 sc in next st, place marker in 2nd st of inc, sc in each remaining st – 42 [48, 52] sc.
Rnds 7-8: Sc in each st around.
Rnd 9: Sc to first marker, 2 sc in marked st, place marker in 1st st of inc, sc to next marker, 2 sc in marked st, place marker in 2nd st of inc, sc in each remaining st – 44 [50, 54] sc.
Repeat Rnds 7-9 for pattern.
Work in pattern for a total of 15 [18, 18] rnds – 48 [56, 60] sc.
Work 3 [2, 4] more rnds even.
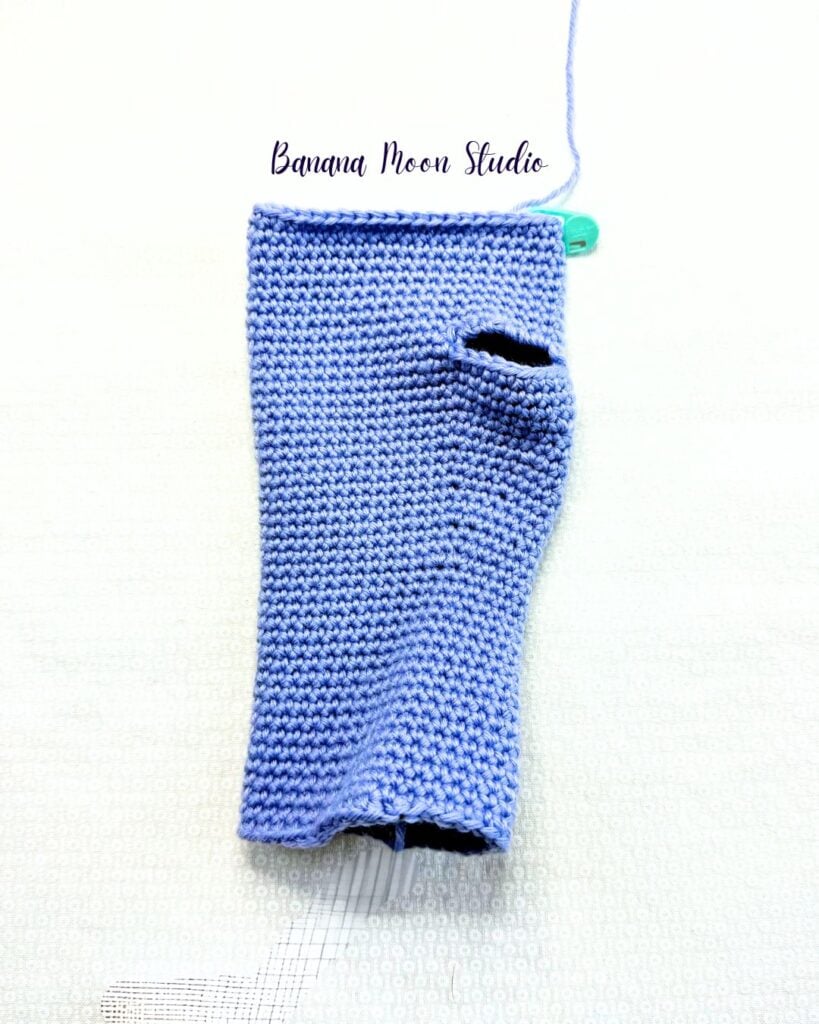
Thumbhole
Rnd 1: Sc to first thumb gusset marker, ch 6 [6, 8], skip both marked sts and all the sts in between them, sc in each remaining st – 38 [44, 48] sc. You can now remove the two thumb gusset markers.
Palm
Rnd 1: Sc to ch-sp, 6 [6, 8] sc in ch-sp, sc in each remaining st – 44 [50, 56] sc.
Rnd 2: Sc in each st around.
Repeat Rnd 2 until you’ve worked a total of 10 [12, 14] rnds from the start of the Palm. Do not fasten off.
Note: You can add or remove rounds in the palm or in the fingers to customize fit. If you don’t have hand measurements available to work with, follow the pattern as written for a more generalized fit. Be warned though, if you add or remove rounds in the palm it will throw off the instructions for the start of each finger. I don’t recommend trying this until you have a really clear idea of how to start the fingers without the detailed instructions that follow.
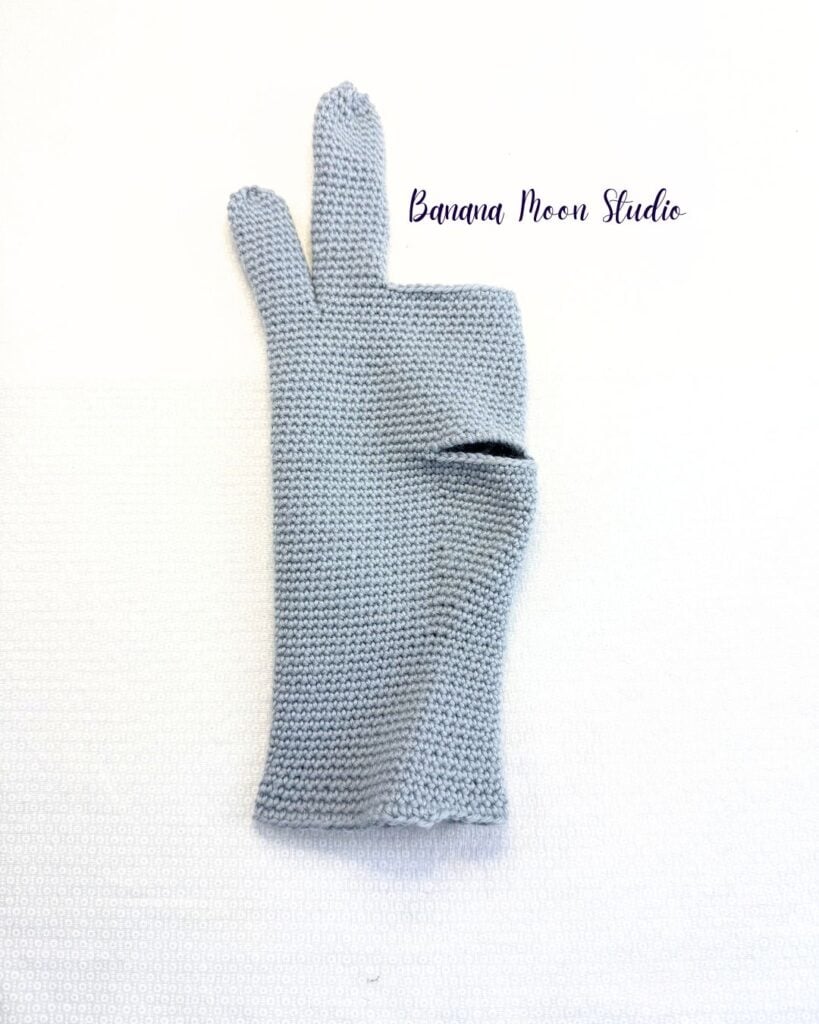
Pinky
Fold the glove in half with the thumbhole all on one side, along the right edge of the glove. This will be the palm of the glove and the other side is the back of the hand.
The pinky will be stitched to the top edge of the glove on the edge opposite the thumbhole. You will use the 10 [12, 12] stitches that form a U along the working edge opposite the thumbhole, 5 [6, 6] from the palm and 5 [6, 6] from the back of the hand. Place stitch markers in the 5th [6th, 6th] stitch into the working edge on both palm and back sides.
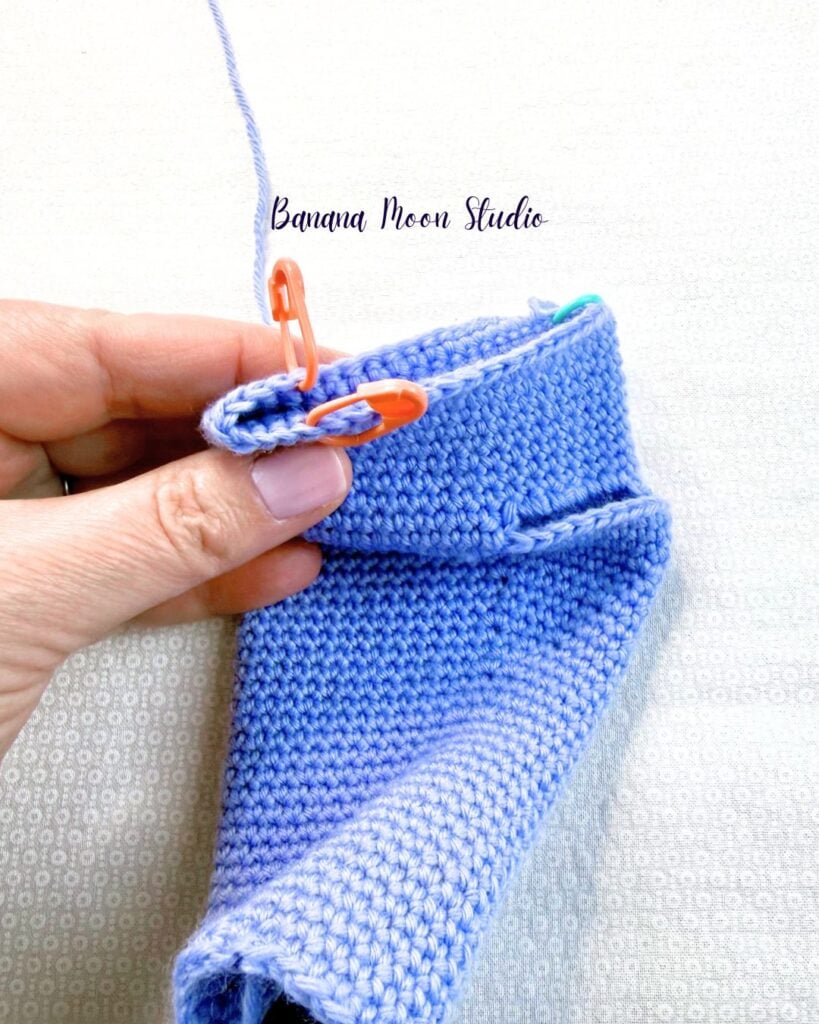
Rnd 1: Continuing from where you finished the last rnd of the Palm, sc in each st to the first pinky marker, sc in marked st and move marker up as work progresses to mark BOR for the pinky, sc in each st to second pinky marker, sc in marked st and remove this marker, ch 2 – 10 [12, 12] sts. You can now remove your original BOR marker from the top edge of the hand.
Rnd 2: Sc in first st and each st around to ch-sp, 2 sc in ch-sp – 12 [14, 14] sts.
Rnd 3: Sc in each st around.
Repeat Rnd 3 for a total of 12 [14, 16] rnds.
Decrease rnd: Sc in first 2 [0, 0] sts, sc2tog around, sl st in next st – 7 sts. Fasten off with a long tail. Close center by using a tapestry needle to weave ending tail back and forth through tops of stitches of final round. Pull tail to close center, then weave end around once or twice more to secure before taking tail to inside of glove.
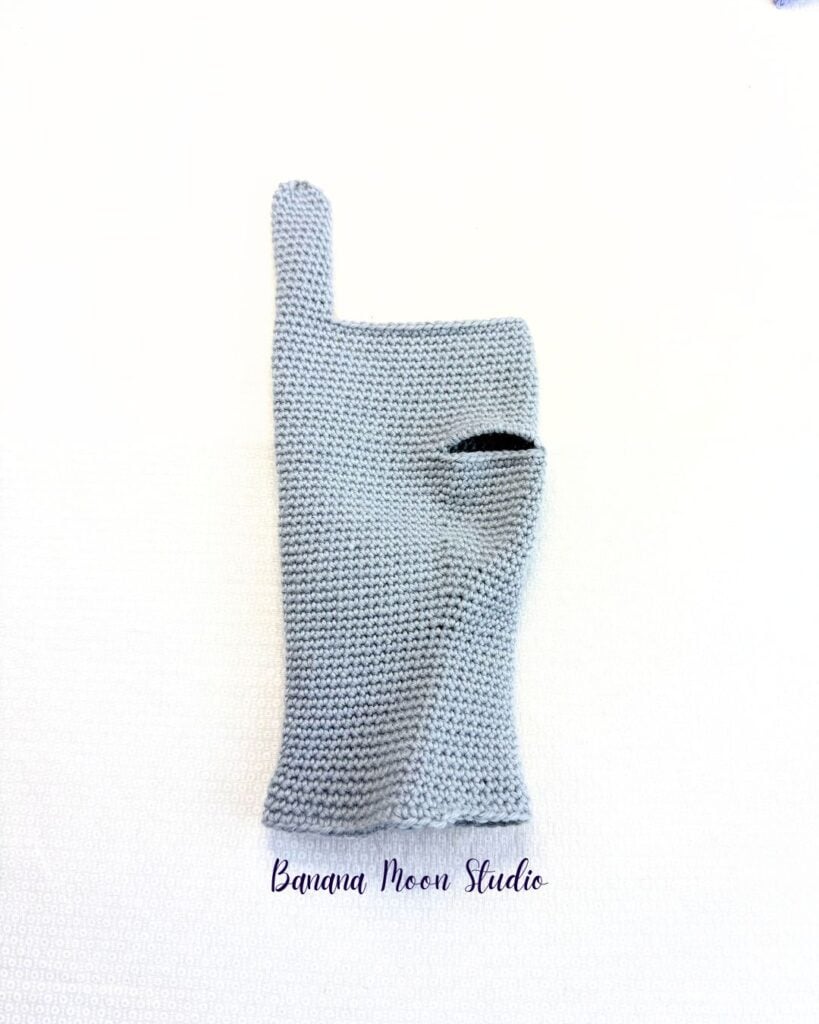
Hand Continued
Rnd 1: With the pinky on the right edge of the piece, join with sc in first unused st along top edge of the back of the hand, place a new BOR marker here, sc in each unused st of last rnd of Palm to opposite edge of pinky, 2 [4, 4] sc in bottom edge of pinky – 36 [42, 48] sts.
Work 1 [2, 4] rnds even. Do not fasten off.
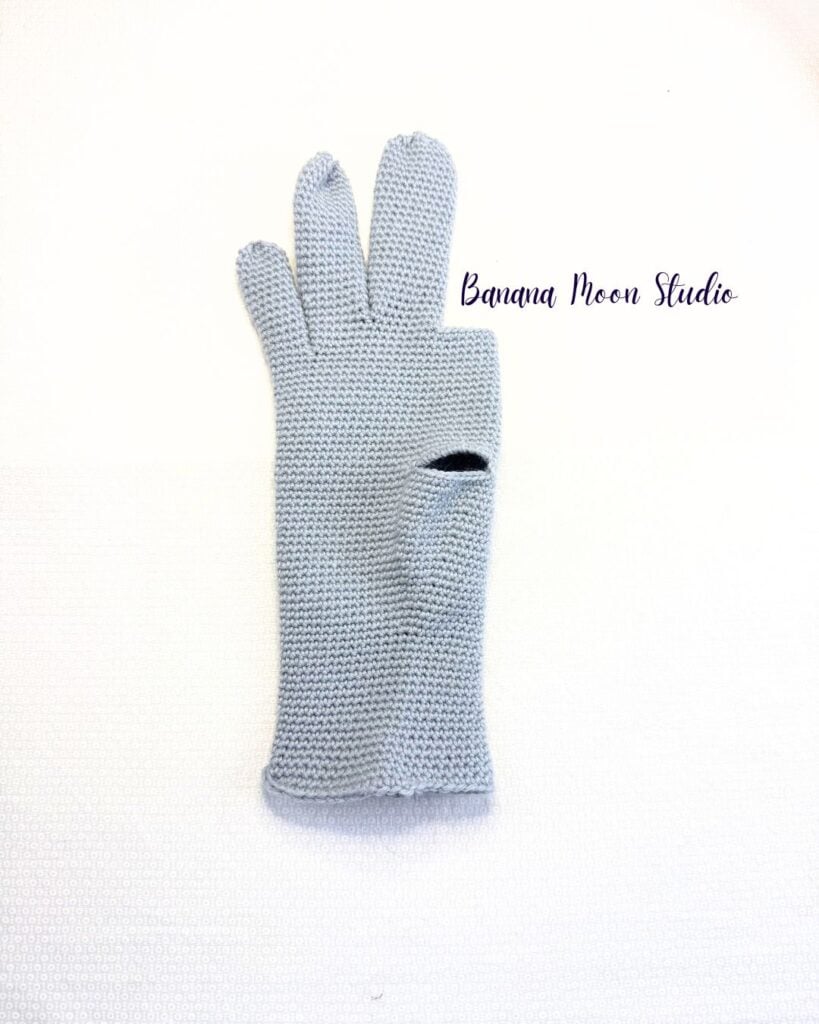
Ring Finger
Counting backwards from BOR marker, place a marker in the 7th [9th, 10th] st.
Rnd 1: Continuing from hand, sc in marked BOR st and move this marker up as BOR for the ring finger, sc in next 4 [4, 5] sts, ch 2, sc in marked st along edge of palm, remove this marker, sc in next 6 [8, 9] sts back to BOR marker – 12 [14, 16] sts.
Rnd 2: Sc in each st to ch-sp, 2 sc in ch-sp, sc in each remaining st – 14 [16, 18] sts.
Rnd 3: Sc in each st around.
Repeat Rnd 3 for a total of 17 [19, 22] rnds.
Decrease Rnd: sc2tog around, sl st in first st – 7 [8, 9] sts. Fasten off with a long tail, close center.
Middle Finger
Along palm of hand, place a marker in the 6th [7th, 8th] st from the edge of the ring finger.
Rnd 1: Join with sc in first unused st along back of the hand and place a marker for middle finger BOR, sc in next 5 [6, 7] sts, ch 2, sc in marked st on palm of hand and remove this marker, sc in next 5 [6, 7] sts, 2 [4, 4] sc in bottom edge of ring finger – 14 [18, 20] sts.
Rnd 2: Sc in each st to ch-sp, 2 sc in ch-sp, sc in each remaining st – 16 [20, 22] sts.
Rnd 3: Sc in each st around.
Repeat Rnd 3 for a total of 20 [21, 25] rnds.
Size Adult M only, First Decrease Rnd: Sc in first 3 sts, sc2tog, [sc in next 3 sts, sc2tog] 3 times – x [16] sts.
Size Adult L only, First Decrease Rnd: Sc in first 3 sts, sc2tog, sc in next 3 sts, sc2tog [sc in next st, sc2tog] 4 times – x [x, 16] sts.
All sizes, Final Decrease Rnd: sc2tog around, sl st in first st – 8 sts. Fasten off with a long tail, close center.
Index Finger
Rnd 1: Join with sc in first unworked st along back of hand and place a marker here for index finger BOR, sc in remaining 11 [13, 15] sts from top edge of hand, 4 sc in bottom edge of middle finger – 16 [18, 20] sts.
Rnd 2: Sc in each st around.
Repeat Rnd 2 for a total of 17 [18, 21] rnds.
Size Adult L only, First Decrease Rnd: Sc in first 3 sts, sc2tog, [sc in next 3 sts, sc2tog] 3 times – x [x, 16] sts.
All sizes, Final Decrease Rnd: sc2tog around, sl st in first st – 8 [9, 8] sts. Fasten off with a long tail, close center.
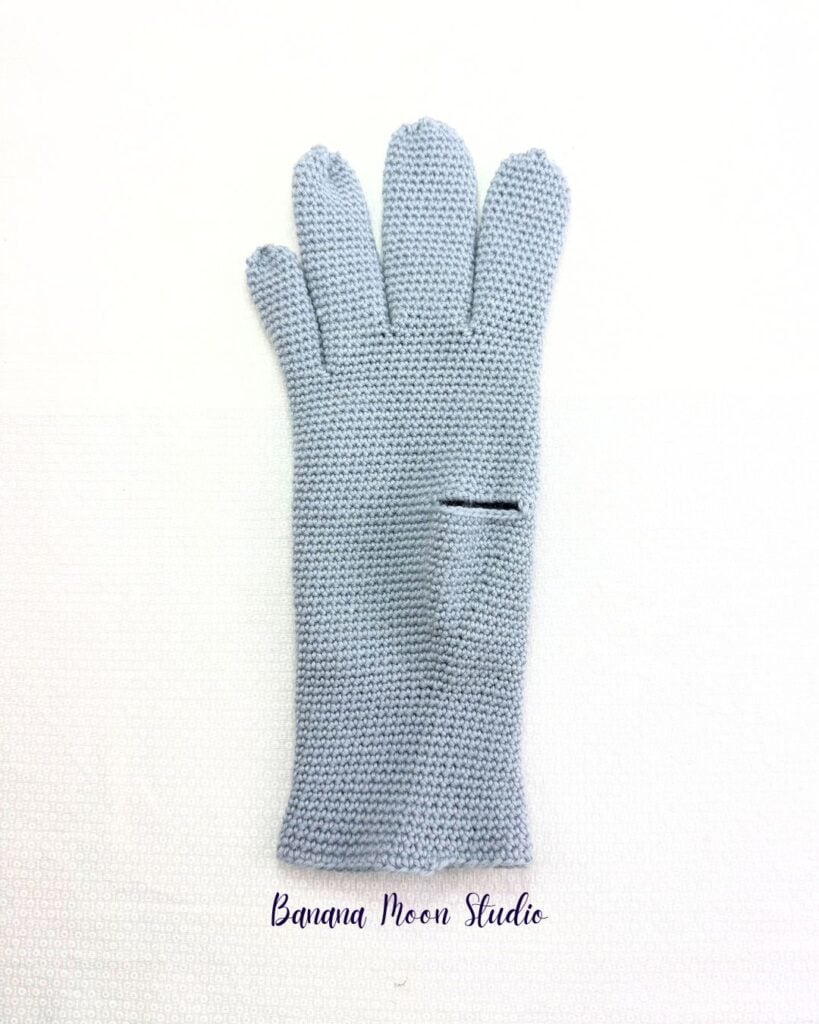
Thumb
Rnd 1: Join with sc in first unworked st of thumb gusset stitches, place marker for BOR and move this marker up as work progresses, sc in next 9 [11, 11] sts, 6 [6, 8] sc in exposed bottom edge of palm – 16 [18, 20] sc.
Rnd 2: Sc in each st around.
Repeat Rnd 2 for a total of 14 [16, 17] rnds.
Size Adult L only, First Decrease Rnd: Sc in first 3 sts, sc2tog, [sc in next 3 sts, sc2tog] 3 times – x [x, 16] sts.
All sizes, Final Decrease Rnd: sc2tog around, sl st in first st – 8 [9, 8] sts. Fasten off with a long tail, close center.
Left Glove
This portion of the pattern is available to email subscribers only. Click the box below to unlock this exclusive subscribers-only content with a free email subscription. Add your email and create a password. If you are having trouble, reset your password or login to Grow.
I love sharing crochet and knitting patterns with you! Please don’t copy, paste, or distribute this pattern. Want an ad-free version? Purchase an inexpensive PDF digital pattern from Ravelry or Etsy. I appreciate your reading, buying, and using my patterns! Because of you, I can keep designing.
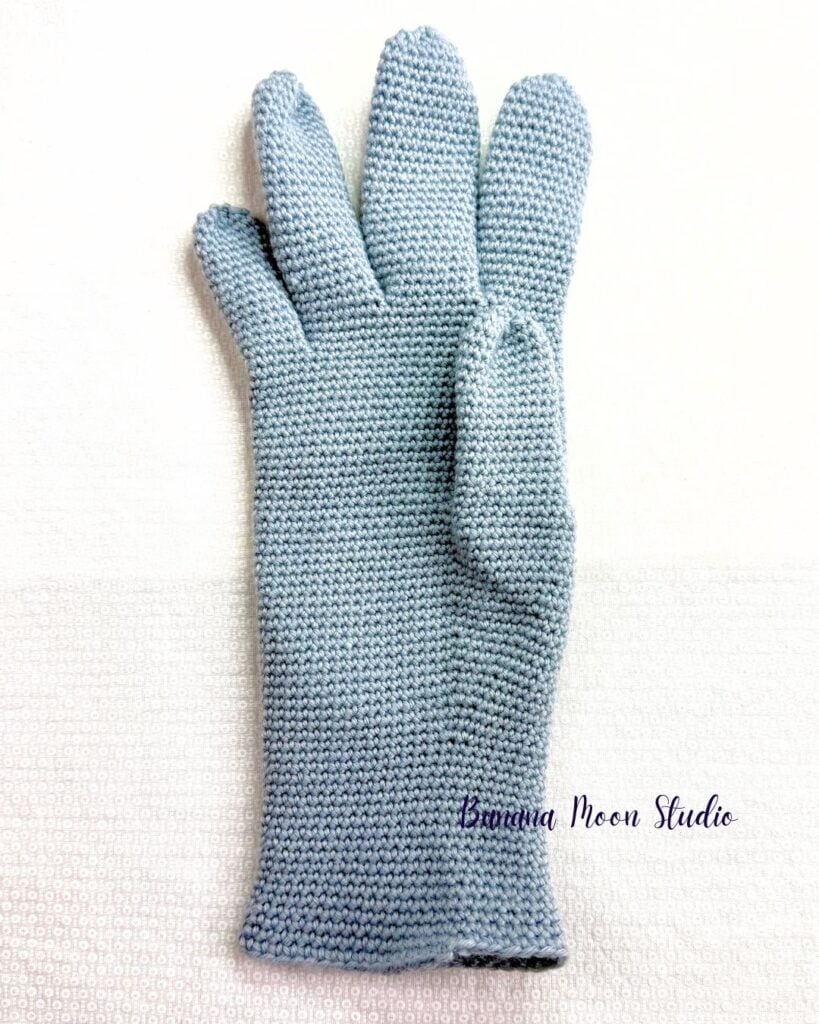
I hope you’ve enjoyed crocheting these fully-fingered gloves!
I would love to see photos of your in-process or finished projects! You can share them on Instagram and tag me, or you can join my friendly Facebook group and share them there.
Happy crocheting!

Save this for later with Pinterest!